Wednesday, June 5, 2024

How can I turn off Microsoft elemetry?


Step 1. Disable schedule for Windows Compatibility Telemetry.

WCT is a service which contains technical data on how the device and its related software are working. To disable it:

  1. Stop and disable the “Connected User Experiences and Telemetry” Windows service 
  2. Click Start, type Task Scheduler, and then press Enter.
  3. On the Task Scheduler window, go to this path: Task Scheduler Library\Microsoft\Windows\Application Experience.
  4. On the Application Experience folder, look for Microsoft Compatibility Appraiser.
  5. Right-click on it, select Disable, and then confirm to complete the process.


Step.2. Disable Microsoft's Diagnostic Tracking.

Next, please run the following command in an elevated cmd (*).

This will remove tracking services:

sc delete DiagTrack  
sc delete dmwappushservice

Add a registry key titled "AllowTelemetry" and sets the key to 0, to disable the telemetry:

reg add HKLM\SOFTWARE\Policies\Microsoft\Windows\DataCollection /v AllowTelemetry /t REG_DWORD /d 0 /f


(*) Note, to run elevated cmd:

Press Windows key and type cmd. This should find the Command line program. Note that searching by "cmd" works in any language version of Windows.

There should be an option to Run as administrator. Use it.

Wednesday, August 31, 2022

Webmin: A web-based Linux management tool


Installing Webmin in Redhat 7


If you're a purist, you can download the tarball from webmin.com, but doing so doesn't give you that much extra control over options. You can choose where to place a few files, but save yourself the effort on RHEL, CentOS, and Fedora by installing the RPM:

$ wget https://www.webmin.com/download/rpm/webmin-current.rpm

$ sudo rpm -Uvh webmin-1.XXX-x.noarch.rpm

If your system doesn't have Perl, then you'll have to satisfy that dependency before installing Webmin. You might also have to install the Encode::Detect and Net::SSLeay Perl modules before installing Webmin:

$ sudo yum install perl-Encode-Detect -y

$ sudo yum install perl-Net-SSLeay -y

Once installed, the installation script directs you to your new Webmin instance at http://<servername>:10000. Log in with your system's root password.

You can change the port, username, and password on the Webmin Configuration option (discussed later). Please do make these changes to the username and password.

Navigating Webmin

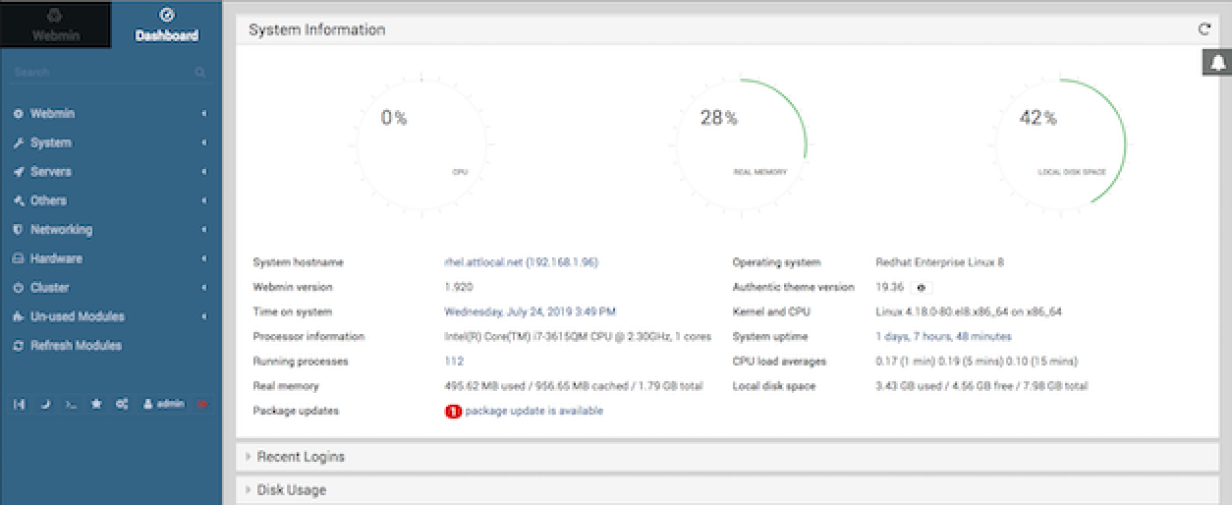
Webmin, by default, starts you out with the so-called "Authentic" theme, with the navigation frame on the left side of the page:  

Image
Webmin main page showing the Dashboard and Navigation pane.

I much prefer the "Old Webmin Theme," but switching to it breaks the current version, which is 1.920 as of this writing.

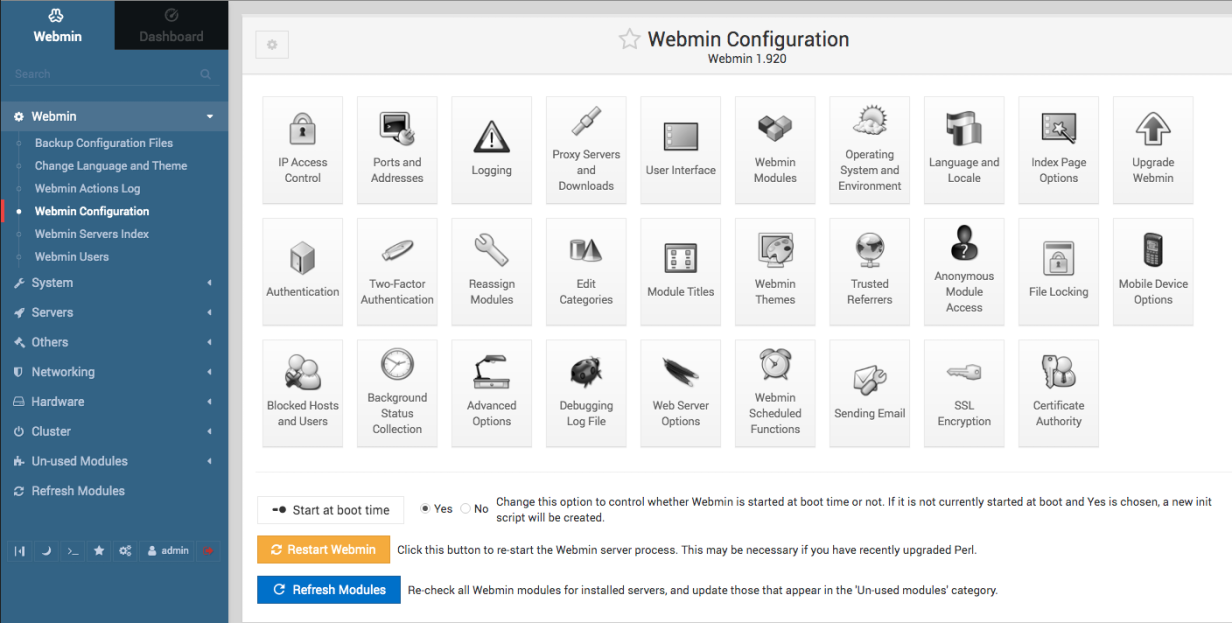
Webmin not only provides system administrators with an abundant list of management tools, but it also comes with its own internal configuration and management options:

Image
Webmin's internal configuration menu.

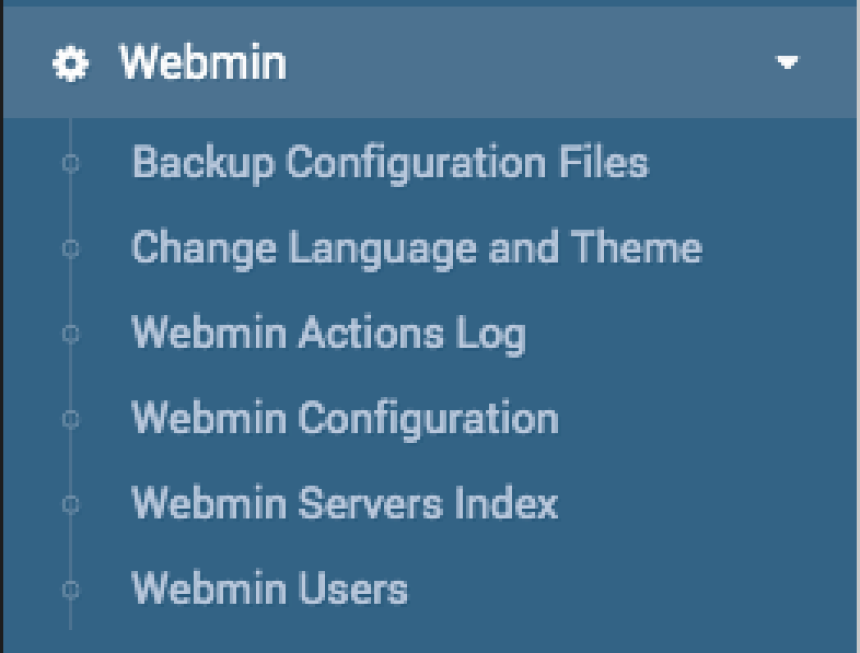
Selecting one of these links opens a number of editable options. For example, below I selected the Webmin Configuration option. As you can see, there are several Webmin behavioral and configuration options available:

Image
Webmin configuration options.

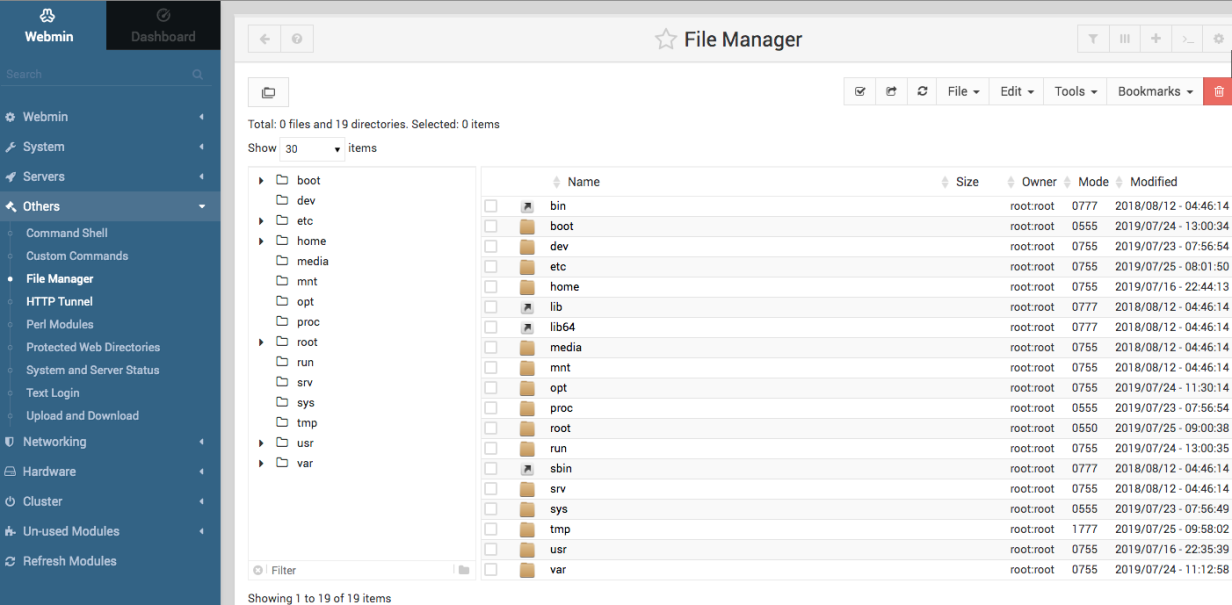
Rather than showing screenshots of every selection from Webmin, I'll let you discover them on your own, but there is one worth taking a closer look at for this overview: Others. Believe it or not, this group of applets is one that I spend a lot of time in. Below, I've selected File Manager from the list to illustrate the depth and richness of these utilities. The volunteer developers have done an excellent job in creating tools that are useful to busy system administrators:

Image
The Webmin Others page's Graphical File Manager tool.

Other notable applets on the Others page are Command ShellPerl ModulesSystem and Server StatusText Login, and Upload and Download. The Command Shell option appears as a root login prompt in the upper left of your screen when selected, containing an interactive shell and not a single command at a time service.

With Perl Modules, you can install Perl modules from CPAN from multiple sources: CPAN itself, local files, URLs, and uploaded files. You can also see a list of your currently installed modules, and optionally install a list of suggested modules with a single click.

The System and Server page provides you with a snapshot of the current status of installed services. There is a drop-down from which you can select a new service to monitor on this screen.

Text Login is a valuable option that provides you with an interactive console terminal login screen. You must have Python installed for this feature to function properly. Also, you might have to create a symbolic link from python to your python executable because the configuration looks for python rather than python2. This is what I did:

$ sudo ln -s /usr/bin/python2 /usr/bin/python

This command satisfies the dependency for the applet.

Finally, the Upload and Download page is valuable for remote uploading and downloading files without access to a secure FTP (SFTP) or secure copy (SCP) client. 

NOTE: If you use Webmin with a Linux server that can be accessed from the internet, please protect this powerful resource by enabling SSL on the Webmin Configuration page, and also enabling multi-factor authentication if possible.


Source: https://www.redhat.com/sysadmin/webmin

 Source: https://www.redhat.com/sysadmin/favorite-linux-sysadmin-tools

Thursday, March 17, 2022

Ubuntu: Extend your default LVM space


Linux LVM Briefly Explained

If you followed the default settings in the Ubuntu installation, then the storage for your Linux OS is probably using the Logical Volume Manager (LVM). LVM is an abstraction framework which exists between your physical (or virtual) disks and your Linux file system (which is likely ext4). It is used to group separate block devices (partitions) together into Volume Groups (VGs), and then chop those VGs up into logical block devices, or Logical Volumes (LVs). LV’s are the abstracted block devices upon which your usable file system resides.

Below is good visualization of how LVM works. In this example, we have 5 different disks, each with a single partition mapped to Physical Volumes (PVs), all being grouped into a single Volume Group (VG). The Volume Group is chopped up into two different Logical Volumes (LVs) and each LV is being used for a filesystem.


Using a similar visualization, the below diagram shows how the Ubuntu installer (using all default options) divided up my 100GB disk.


Ubuntu Installer Default Settings

When installing Ubuntu, it has you approve a storage layout in a couple different screens (shown below). By default this storage layout will have a couple small boot partitions, and a third partition, which will be used by your LVM to create your root filesystem. You should be able to see the consistency between the screens below and the diagram above.


Use Your Default Free Space

As you can see above: the Ubuntu installer (by default) left almost half of my disk space unusable by the root file system! I’ve looked around to find an explanation on why these are the default settings, but can’t find anything. Before extending your underlying hypervisor disk or storage volume, you may want to see if you have free space available and ready to be used to extend your existing file system. If you used the Ubuntu defaults during installation, then there is a good chance you have this free space.

Start by checking your root filesystem free space with df -h. As you can see I am only using 14% of my ~49GB volume, but we’ll pretend I’m close to 100% and need to make that 49GB volume larger.

To check for existing free space on your Volume Group (where it is left by the installer default settings), run the command vgdisplay and check for free space. Here you can see I have 49.25GB of free space ready to be used. If you don’t have any free space, move on to the next section to use some free space from an extended physical (or virtual) disk.

To use up that free space on your Volume Group (VG) for your root Logical Volume (LV), first run the lvdisplay command and check the Logical Volume size, then run lvextend -l +100%FREE /dev/ubuntu-vg/ubuntu-lv to extend the LV to the maximum size usable, then run lvdisplay one more time to make sure it changed.

At this point you have increased the size of the block volume where your root filesystem resides, but you still need to extend the filesystem on top of it. First, run df -h to verify your (almost full) root file system, then run resize2fs /dev/mapper/ubuntu--vg-ubuntu--lv to extend your filesystem, and run df -h one more time to make sure you’re successful.

And that’s it. You just allocated the free space left behind by the Ubuntu installer to your root filesystem. If this is still not enough space, continue on to the next section to allocate more space by extending an underlying disk.


Use Space from Extended Physical (or Virtual) Disk

First you need to increase the size of the disk being presented to the Linux OS. This is most likely done by expanding the virtual disk in KVM/VMWare/Hyper-V or by adjusting your RAID controller / storage system to increase the volume size. You can often do this while Linux is running; without shutting down or restarting. I’ve extended my 100GB disk to 200GB for my example machine.

Once that is done, you may need to get Linux to rescan the disk for the new free space. Check for free space by running cfdisk and see if there is free space listed, use “q” to exit once you’re done.

If you don’t see free space listed, then initiate a rescan of /dev/sda  with echo 1>/sys/class/block/sda/device/rescan. Once done, rerun cfdisk and you should see the free space listed.

Select your /dev/sda3 partition from the list and then select “Resize” from the bottom menu. Hit ENTER and it will prompt you to confirm the new size. Hit ENTER again and you will now see the /dev/sda3 partition with a new larger size.

Select “Write” from the bottom menu, type yes to confirm, and hit ENTER. Then use “q” to exit the program.

Now that the LVM partition backing the  /dev/sda3 Physical Volume (PV) has been extended, we need to extend the PV itself. Run pvresize /dev/sda3 to do this and then use pvdisplay to check the new size.

As you can see above, my PV has been increased from 98.5GB to 198.5GB. Now let’s check the Volume Group (VG) free space with vgdisplay.

We can see above that the VG has 100GB of free space. Now let’s check the size of our upstream Logical Volume (LV) using lvdisplay, extend the LV to use up all the VG’s free space with lvextend -l +100%FREE /dev/ubuntu-vg/ubuntu-lv, and then check the LV one more time with lvdisplay to make sure it has been extended.

At this point, the block volume underpinning our root filesystem has been extended, but the filesystem itself has not been resized to fit that new volume. To do this, run df -h to check the current size of the file system, then run resize2fs /dev/mapper/ubuntu--vg-ubuntu--lv to resize it, and df -h one more time to check the new file system available space.

And there you go. You’ve now taken an expanded physical (or virtual) disk and moved that free space all the way up through the LVM abstraction layers to be used by your (critically full) root file system.


Source: https://packetpushers.net/ubuntu-extend-your-default-lvm-space/#:~:text=To%20use%20up%20that%20free,to%20make%20sure%20it%20changed.

Wednesday, March 16, 2022

How to Reset Forgotten Ubuntu Password in 2 Minutes


Step 1: Boot into recovery mode

Switch the computer on. Go to the grub menu. Generally, it appears automatically – if not, then hold down the shift key or press Esc key until the boot menu appears.

If you’re using Oracle VirtualBox or VMware, you have to hold down the shift key when the logo of Oracle or VMware appears.

In the grub menu, select the “Advanced Options for Ubuntu”:

Advanced boot options in Grub menu of Ubuntu
This is grub screen

In here, you’ll see the option to go to recovery mode:

Boot into recovery mode

It will bring you to a black screen with several lines of output being displayed in a flash. Wait for a few seconds here.

Step 2: Drop to root shell prompt

Now you’ll be presented with different options for recovery mode. Here you need to choose “Root – Drop to root shell prompt“.  Just press the enter key to select this option. Like in the picture below:

Root shell prompt allows you to reset password in Ubuntu

You’ll see that when you select the root shell prompt option, an option to enter commands appears at the bottom. This is your root shell prompt and this is where you’ll use the commands to reset the password.

Step 3: Remount the root with write access

You need to have write access to the root partition. By default, it has read-only access.

Use the command below to remount it with write access:

mount -rw -o remount /

Step 4: Reset username or password

Here, you’ll be given root access. Use the following command to list all the users available:

ls /home

Based on this command, choose the “username” for which you want to reset or (say) hack the password. Now, use the following command to reset the password for the selected “username“:

passwd username

It prompts for a new password. Enter the new password twice:

Enter new UNIX password:
Retype new UNIX password:

VoilĂ ! There you go. You have just successfully reset the password. Now exit the root shell prompt:

exit

When you exit, you’ll be back at the recovery mode menu. Select the normal boot option here.

Use recovery mode to boot normal after resetting password in Ubuntu

There will be a warning about graphics mode compatibility. Don’t worry. A complete reboot will fix any issues with this.

You should now be able to log in with the new password.


Source: https://itsfoss.com/how-to-hack-ubuntu-password/